Check out what Maker in Residence Ruby is experimenting with, and pick up some handy how-tos!
Origami: Place in a Makerspace
An Intro to Origami
Origami is a beautiful traditional paper craft whereby we create folds known as mountains and valleys. Once folded, the paper forms a new shape. Read more about the history of Origami by Joseph Wu here.
The Basics
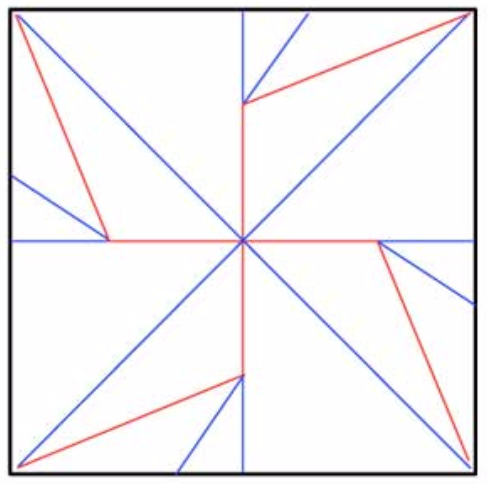
There are two types of folds: mountain and valley folds. Often mountain and valley folds are distinguished by colours or different dotted lines. Crease patterns are lines on a piece of paper indicating where the paper should be folded. The first one below is an easier design than the second. You can see in both how folds are distinguished from one another:

Compressable Origami
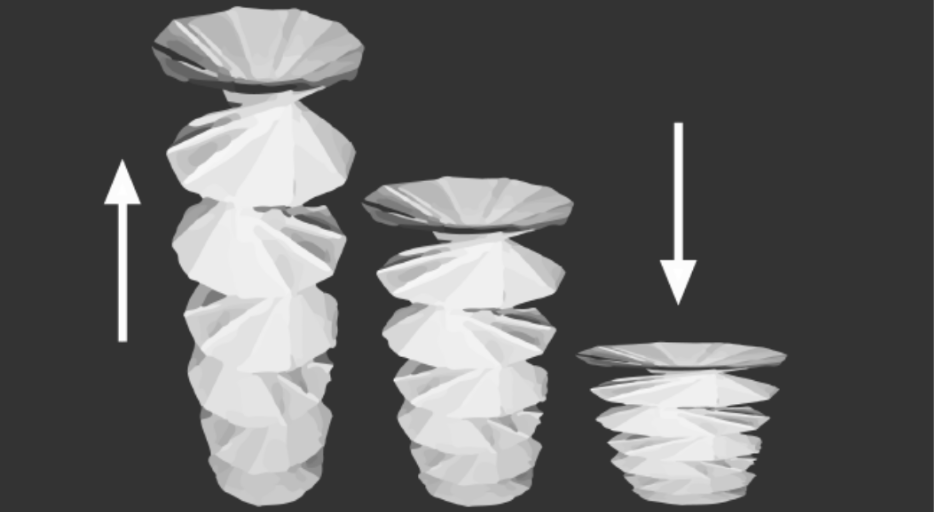
Now, depending on origami design, you can create works that change shape with an action – for example pulling or pushing the paper, or blowing into it. This leads to the idea of compression and expansion of origami structures. By having compression and expansion of origami, you can motorise these so that they can respond to real time changes. Here we use a design called Spring Origami. You can read how to make this here. We can see in the digram below one can pull to expand the origami and push to compress. The expansion of an A4 spring origami is approx. length of 20cm, with compression of length 5mm.
Origami with (newer) Tools
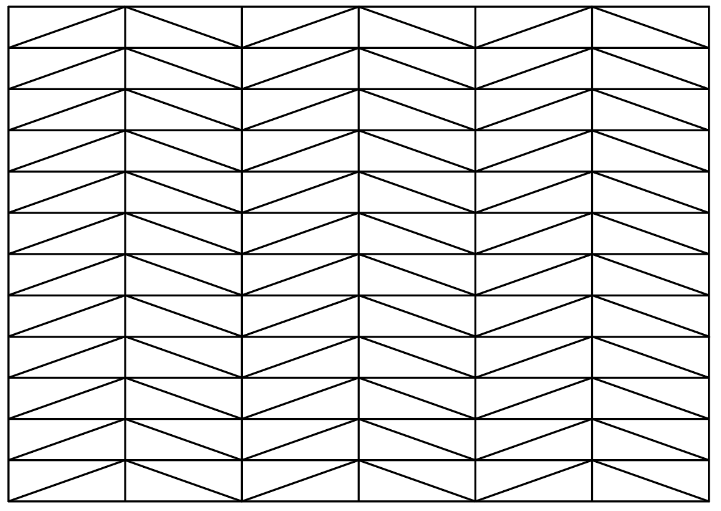
Now we look at automating the creation of Origami. I say newer technology, but its been around for a while! I decided to try out the Vinyl Cutter. This machine usually does just that, cut vinyl. It iterates back and forth on a single axis, whilst rolling the vinyl back and forth, hence it can create the expected horizontal, vertical, even diagonal lines, and more importantly curves. Here we can use the vinyl cutter to etch in where our folds are. Note we do not fully cut the paper, but only etch it. The picture below illustrates the etching of the spring origami pattern.

Settings and Process
1. Turn on the machine
2. Lift up machine grabber to grab required paper. Place paper in – If thin consider doubling up
paper to ensure cutter does not damage the machine.
3. Select paper on machine interface, whereby it will continue to measure the useable area of the paper. Ensure you take the measurements the interface gives you – being the length and width
4. Select force of cutter to be 100 – will need calibration depending on paper thickness.
5. Send SVG from Inkscape to printer, ensuring document size and vector size does not exceed
measurements given from 3
Issues with this Technique
Paper sliding: when doubling down on paper to protect the machine, you may find paper slides and hence your lines aren’t as precise as you’d like them to be.
Thicker paper: thick paper works well to etch, but alas it fails to fold.
Paper cut: Depending on your calibration of the force of the vinyl cutter, you may find paper to be cut rather than etched.
Paper coming apart: paper will often split – if not at first whilst doing origami folding itself.
Clogging the machine: the machine has clogged due to the way its moving around on the paper and getting caught on pre-existing etches.
Type of Fold: doesn’t account for valley and mountains.
Advice
Use thin paper, but ensure you have doubled it up
Ensure ordering of your vectors, to reduce movement of the cutter and roller going back and forth to cause clogs.